Tuesday, 2 April 2013
Step By Step Turbo C++ IDE In Ubuntu 12.04
Well we are doing our labs based on the traditional Turbo C++ IDE and I decided to write this blog post with the information on how I installed it on my Ubuntu box.
First thing first, download Turbo C from internet. For your ease, I've uploaded it HERE.
We will have to install dosbox to run the windows dos mode applications so lets install it:
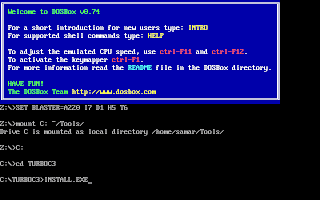
Once you install dosbox, unzip the content to somewhere in your $HOME directory. In my example, I unzipped the content of the Turbo C zip file into ~/Tools/TurboC3/. Now launch the dosbox by typing dosbox in the terminal. A dosbox emulation window will appear which will look like your old DOS system.
In the window, type the following (make sure you type appropriate path for your installation):
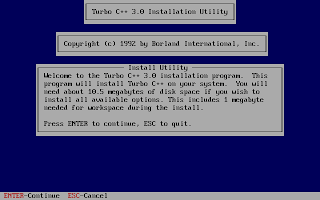
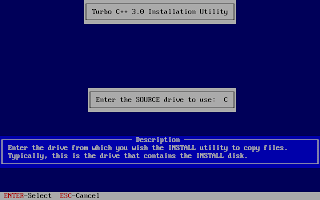
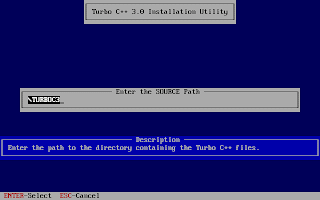
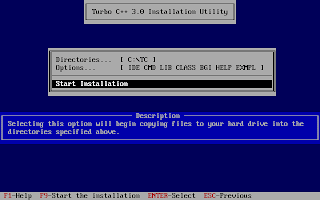
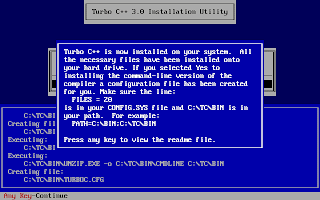
And, then follow the on-screen information. Refer to the screenshots below:
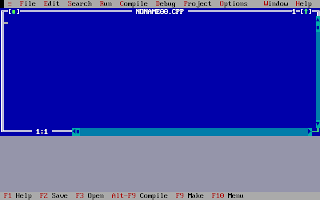
Once the installation finishes, you can then run the Turbo C by mounting the drive again and then navigation to C:\TC (cd C:\TC\BIN). If you need to use the Turbo C++ IDE frequently, my suggestion would be to add an autoexec entry in your dosbox configuration. The default configuration file resides in ~/.dosbox/dosbox-0.74.conf (My version of dosbox is 0.74 hence the file name, by default). Open up this file and in the section of [autoexec], add the lines below:
Adding this entry will run the above commands during the startup of dosbox thus giving you the Turbo C IDE interface directly on running dosbox.
I hope this helps :)
First thing first, download Turbo C from internet. For your ease, I've uploaded it HERE.
We will have to install dosbox to run the windows dos mode applications so lets install it:
samar@samar-Techgaun:~$ sudo apt-get install dosbox
Once you install dosbox, unzip the content to somewhere in your $HOME directory. In my example, I unzipped the content of the Turbo C zip file into ~/Tools/TurboC3/. Now launch the dosbox by typing dosbox in the terminal. A dosbox emulation window will appear which will look like your old DOS system.
In the window, type the following (make sure you type appropriate path for your installation):
mount C: ~/Tools/
C:
cd TurboC3
INSTALL.EXE
C:
cd TurboC3
INSTALL.EXE
And, then follow the on-screen information. Refer to the screenshots below:


Once the installation finishes, you can then run the Turbo C by mounting the drive again and then navigation to C:\TC (cd C:\TC\BIN). If you need to use the Turbo C++ IDE frequently, my suggestion would be to add an autoexec entry in your dosbox configuration. The default configuration file resides in ~/.dosbox/dosbox-0.74.conf (My version of dosbox is 0.74 hence the file name, by default). Open up this file and in the section of [autoexec], add the lines below:
[autoexec]
mount C: ~/Tools/
C:
cd TC\BIN
TC.EXE
mount C: ~/Tools/
C:
cd TC\BIN
TC.EXE
Adding this entry will run the above commands during the startup of dosbox thus giving you the Turbo C IDE interface directly on running dosbox.
I hope this helps :)
Labels:
linux,
linuxmint,
tricks and tips,
ubuntu 11.10,
ubuntu 12.04,
ubuntu 12.10
Bookmark this post:blogger tutorials
Social Bookmarking Blogger Widget |
Step By Step Turbo C++ IDE In Ubuntu 12.04
2013-04-02T21:40:00+05:45
Cool Samar
linux|linuxmint|tricks and tips|ubuntu 11.10|ubuntu 12.04|ubuntu 12.10|
Subscribe to:
Post Comments (Atom)